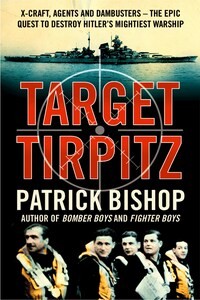
Target Tirpitz: X-Craft, Agents and Dambusters - The Epic Quest to Destroy Hitler’s Mightiest Warship
A gripping account of the epic hunt for Hitler’s most terrifying battleship – the legendary Tirpitz – and the brave men who risked their lives to attack and destroy this most potent symbol of the Nazi’s fearsome war machine.Tirpitz was the pride of Hitler’s navy. To Churchill, she was ‘the Beast’, a menace to Britain’s supply lines and a threat to the convoys sustaining Stalin’s armies. Tirpitz was said to be unsinkable, impregnable –no other target attracted so much attention.In total 36 major Allied operations were launched against her, including desperately risky missions by human torpedoes and midget submarines and near-suicidal bombing raids. Yet Tirpitz stayed afloat. It was not until November 1944 that she was finally destroyed by RAF Lancaster Bombers flown by 617 Squadron – the Dambusters – in a gruelling mission that tested the very limits of human endurance.The man who led the raid – Willie Tait – was one of the most remarkable figures of the war, flying missions almost continuously right from the start. Until now his deeds have been virtually unknown. With exclusive co-operation from Tait’s family, Patrick Bishop reveals the extraordinary achievement of a man who shunned the spotlight but whose name will be renowned for generations to come.The book is a magnificent, accessibly written wartime adventure, perfect for fans of Ben Macintyre’s ‘Agent Zigzag’ or ‘Operation Mincemeat’.
Читать Target Tirpitz: X-Craft, Agents and Dambusters - The Epic Quest to Destroy Hitler’s Mightiest Warship онлайн беплатно
TARGET TIRPITZ
X-CRAFT, AGENTS AND DAMBUSTERS – THE EPIC QUEST TO DESTROY HITLER’S MIGHTIEST WARSHIP
PATRICK BISHOP

To Tony and Mary
Contents
Dedication
List of Illustrations
List of Maps
Plans of Tirpitz
Diagrams of X-Craft
Ranks of the Kreigsmarine
Prologue
Chapter 1: The Belly of the Beast
Chapter 2: Wilhelmshaven, Saturday, 1 April 1939
Chapter 3: Swordfish
Chapter 4: Trondheim
Chapter 5: ‘A wonderful chance’
Chapter 6: ‘A somewhat desperate venture’
Chapter 7: Smoke and Fog
Chapter 8: Provoking Nemesis
Chapter 9: ‘A heart-shaking decision’
Chapter 10: A Ha’porth of Tar
Chapter 11: The Iron Castle
Chapter 12: Enter the Lion
Chapter 13: Madmen
Chapter 14: The Great Adventure
Chapter 15: ‘A bloody great bang’
Chapter 16: North Cape
Chapter 17: Tungsten
Chapter 18: The Third Man
Chapter 19: ‘My God Mac, they’ve had it today’
Epilogue
Picture Section
Notes
Index
Acknowledgments
Also by Patrick Bishop
Copyright
About the Publisher
Integrated
6 A German naval dingy alongside capsized Tirpitz. (TopFoto.co.uk)
12 Erich Räder with grossadmiral’s baton. (akg-images/Imagno)
29 Fairey Swordfish in flight. (akg-images/akg/De Agostini Picture Library)
42 Flight Lieutenant A. F. P. Fane. (Courtesy Estate of Mrs J. M. Harris)
45 Karl Topp and Kurt Voigt. (Courtesy Jurgen Voigt)
76 The end of the Izhora. (David Brown/Tirpitz Collection, reproduced in Menace by Ludovic Kennedy, Sidgwick and Jackson, 1979)
95 HMS Campbeltown wedged in the Normandie dock gates. (Popperfoto/Getty Images)
103 Air Marshall Sir Arthur ‘Bomber’ Harris. (© Hulton-Deutsch Collection/CORBIS)
123 Gunga Din film poster. (© Michael Nicholson/CORBIS)
148 A PQ.17 steamer falls victim to the U-boats. (TopFoto.co.uk)
164 Leif Larsen. (Courtesy Literary Estate of David Howarth)
178 A seaman with a model of Tirpitz. (ww2incolor.com)
179 Singer Lale Andersen posing as Lili Marlene. (akg-images/ullsteinbild)
202 Kapitän Hans Meyer. (akg-images/Interfoto)
209 Barentsburg viewed from the decks of Tirpitz. (John Asmussen/bismarck- class.dk)
213 Max Shean. (© Peter Hore)
239 HMS Stubborn. (The Trustees of the Imperial War Museum, London, FL19434)
243 X-8 attack and passage crew before departure on Operation Source. (The Royal Navy Submarine Museum)
253 Donald Cameron VC. (The Trustees of the Imperial War Museum, London, A21798)
255 Henty Henty-Creer (John Robertson/rohspecialforces.com)
278 Admiral Bruce Fraser adding rum to the Christmas pudding on the Duke of York. (The Trustees of the Imperial War Museum, London, A20183)
280 Arseni Golovko. (Reproduced in With the Red Fleet by Arseni Golovko, Putnam & Co Ltd, 1965)
297 HMS Victorious at sea. (The Trustees of the Imperial War Museum, London, A22152)
311 Hellcats on HMS Furious. (The Trustees of the Imperial War Museum, London, A24771)
320 Barnes Wallis with a model of the Tallboy. (The Trustees of the Imperial War Museum, London, A24771)
334 Guy Byam and Stanley Maxted. (Daily Mail archives)
340 Tallboy in flight. (The Trustees of the Imperial War Museum, London, CH 15380)
356 Bomber Command interpretation report diagram. (Andrew Pinder)
368 Klaus Rohwedder at Wilhelmshaven. (Author’s collection)
Plate sections
Hitler in Wilhelmshaven for the launching of Tirpitz. (Time & Life Pictures/Getty Images)
The battleship Tirpitz just before launch at Wilhelmshaven. (Time & Life Pictures/Getty Images)
Kapitän zur See Karl Topp on the navigation bridge of Tirpitz. (The Trustees of the Imperial War Museum, London, HU 50747)
Injured observer Dunworth being carried from his Albacore, March 1942 (The Trustees of the Imperial War Museum, London, A 7902)
Ice-caked deck of British warship in Northern Waters, 1942. (Topham/AP/TopFoto.co.uk)
Admiral Sir Dudley Pound walking to No. 10 with Winston Churchill. (© Associated Newspapers/Daily Mail/Rex Features)
Admiral Sir John Tovey. (Süddeutsche Zeitung Photo/Scherl)
Escorts and merchant ships of convoy PQ.17 at Hvalfjord, May 1942. (The Trustees of the Imperial War Museum, London, A 8953)
Tirpitz steaming through Altafjord, 16 March 1944. (John Asmussen, www.bismarck-class.dk)
RAF reconnaissance picture of Tirpitz in Trondheim. (ww2images.com)
Bjorn Rorholt. (Private Collection)
Tirpitz at anchor off Kaafjord, 4 July 1942. (The Trustees of the Imperial War Museum, London, HU 50983)
Mark Two Human Torpedo, 1942. (ww2images.com)
X-10 with Sub-Lieutenant Page on the casing. (The Royal Navy Submarine Museum)
Interior of X-craft with Sub Lt. ‘Robbie’ Robinson. (The Royal Navy Submarine Museum)
X-craft commanding officers before departure on Operation Source. (The Royal Navy Submarine Museum)
Tirpitz moored in Kaafjord. (Popperfoto/Getty Images)
View from Tirpitz of the X-Craft attack. (ww2images.com)
X-craft survivor John Lorimer on board Tirpitz after capture. (ww2images.com)